 por
por How I cut load times by 2 seconds with these tricks
The digital landscape is fiercely competitive, and in this race, speed is paramount. For too long, I watched my website languish with frustratingly slow load times, driving away potential visitors and hindering my online presence. It wasn’t just an inconvenience; it was a significant impediment to growth, impacting everything from user experience to search engine rankings. This article isn’t just a recount of my struggles; it’s a practical guide, detailing the exact strategies I employed to dramatically cut load times by a full two seconds, transforming my sluggish site into a responsive, high-performance platform. If you’ve ever asked «»why is my website slow?»», then this journey of website speed optimization is for you.
My Website Was So Slow!
The frustration was palpable. Every time I visited my own website, I was greeted by a spinning loader or a partially rendered page, a stark reminder of its glacial pace. It wasn’t just embarrassing; it was detrimental. Analytics showed high bounce rates, indicating that visitors weren’t sticking around long enough to even see my content, let alone engage with it. My dream of building a robust online platform was being undermined by a fundamental flaw: a painfully slow website. This wasn’t just about aesthetics; it was about the core functionality and the very first impression my brand made online. I knew I needed to improve website performance urgently.
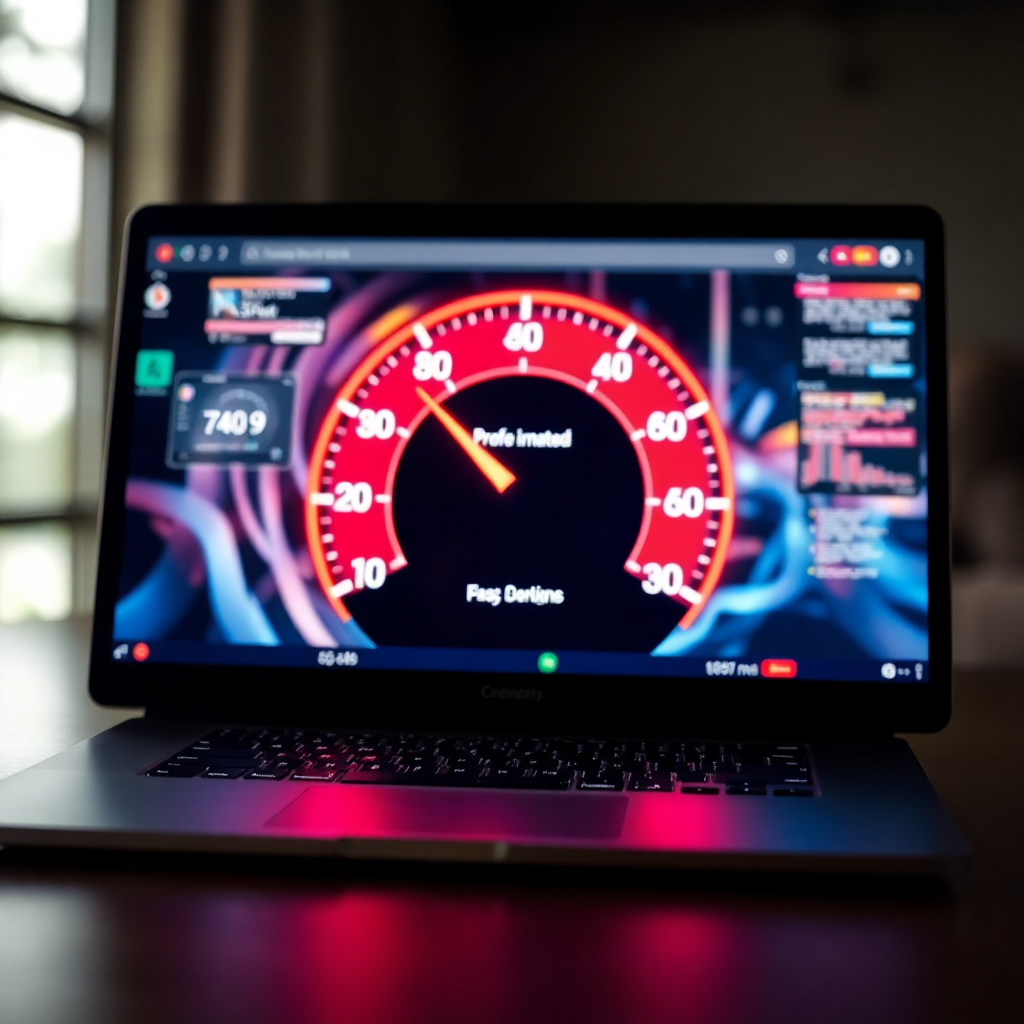
My initial assessment using tools like Google PageSpeed Insights, GTmetrix, and Pingdom Tools painted a grim picture. Scores were consistently in the red or low orange, flagging numerous issues from render-blocking resources to unoptimized images. These reports provided a stark, data-driven confirmation of my site’s poor health, highlighting specific areas that needed immediate attention. I learned that a good score wasn’t just a vanity metric; it directly correlated with user satisfaction and search engine favorability. The data clearly showed that if I wanted to reduce page load time, I had to tackle these issues head-on.
The impact of this sluggishness extended far beyond mere annoyance. Search engines, particularly Google, openly state that page speed is a ranking factor. My slow site was actively being penalized, pushing my content lower in search results, regardless of its quality. Furthermore, the psychological effect on users was profound; studies consistently show that users expect pages to load in under 2-3 seconds, and anything beyond that leads to abandonment. This meant lost leads, missed conversions, and a continuous drain on potential revenue. The realization hit hard: how to cut website load times wasn’t just a technical task; it was a business imperative.
The Real Culprit: Big Images
Upon diving into the performance reports, one consistent offender stood out like a sore thumb: images. My website, rich with high-quality photographs and graphics, was unknowingly burdened by excessively large image files. These images, while visually appealing, were often uploaded directly from a camera or design software without any optimization, resulting in megabyte-sized files that took ages to download, significantly increasing my overall page speed. This was a classic case of prioritizing visual fidelity over practical web performance, a common mistake many website owners make.
The problem wasn’t just the sheer file size; it was also the dimensions and formats. Many images were far larger than their display size on the website, meaning the browser was downloading unnecessary pixel data. Furthermore, I was using inefficient file formats like uncompressed JPEGs or even PNGs for photographic content where JPEGs would have been more suitable. This oversight alone was responsible for a significant portion of my prolonged site speed. It became clear that addressing image optimization was not just one step; it was the most critical first step to reduce load times.
My strategy to conquer image bloat involved a multi-pronged approach, focusing on reducing file size without compromising visual quality. This wasn’t about making images look bad; it was about smart, efficient delivery.
Here are the actionable steps I took:
- Resizing Images Before Uploading: I adopted a strict policy of resizing images to their maximum display dimensions before uploading them to the website. For a blog post image that would display at 800px wide, there was no need to upload a 4000px wide image. This simple act alone drastically cut down file sizes.
- Image Compression: I implemented both lossy and lossless compression.
- Adopting Next-Gen Formats (WebP): WebP is a modern image format that provides superior lossless and lossy compression for images on the web. I configured my site to serve WebP images to compatible browsers, falling back to JPEG/PNG for older browsers. This delivered significant savings, often 25-35% smaller than comparable JPEG files.
- Implementing Lazy Loading: This technique ensures that images outside the user’s current viewport (the part of the page they can see) are only loaded when they scroll down. This dramatically reduces the initial page load, as the browser doesn’t have to download all images at once. Many modern WordPress themes and plugins offer this functionality, and it’s even natively supported by most browsers now.
- Plugin Audit and Pruning:
- Minification of CSS, JavaScript, and HTML:
- Combining Files to Reduce HTTP Requests:
- Deferring and Asynchronously Loading JavaScript:
- Enabling GZIP Compression:
- Page Caching: This is the most critical type of caching. It saves the fully rendered HTML output of your pages. When a user requests a page, the server delivers this cached HTML file instead of dynamically generating it.
- Browser Caching (Leverage Browser Caching): This instructs a user’s browser to store certain files (like images, CSS, and JavaScript) locally on their device. When they revisit your site, or navigate to another page, the browser doesn’t need to re-download these static assets from the server.
- Object Caching: For dynamic WordPress sites, database queries can be a bottleneck. Object caching stores the results of complex database queries, so the next time the same query is made, the result can be retrieved from memory instead of hitting the database again.
- CDN Caching (Content Delivery Network): A CDN stores copies of your website’s static assets (images, CSS, JS) on servers located around the globe. When a user visits your site, these assets are delivered from the server geographically closest to them, significantly reducing latency and speeding up delivery.
- SSD Storage: Traditional Hard Disk Drives (HDDs) are slower. Solid State Drives (SSDs) offer significantly faster read/write speeds, which translates directly to quicker database queries and file access. I ensured my new hosting plan utilized SSDs exclusively.
- Sufficient RAM and CPU: These resources dictate how many processes your server can handle simultaneously and how quickly it can execute them. A plan with adequate RAM and CPU ensures your site can manage traffic spikes and complex operations without slowing down. I moved from a basic shared plan to a managed WordPress VPS (Virtual Private Server) which allocated dedicated resources to my site.
- Server Location: The geographical proximity of your server to your target audience plays a significant role in latency. If your audience is primarily in Europe, a server in Europe will provide faster response times than one in North America. I chose a hosting provider with data centers strategically located near my primary user base.
- HTTP/2 (and HTTP/3): These are modern web protocols designed for faster communication between browsers and servers. They allow for multiplexing (multiple requests over a single connection) and header compression, drastically improving web performance. I confirmed my new host supported HTTP/2 by default, and many modern hosts are now rolling out HTTP/3.
- Built-in Caching Mechanisms: Many premium hosts offer server-level caching (like Varnish or Nginx FastCGI cache) which is incredibly efficient as it bypasses application-level processing entirely. My new host included robust server-side caching that worked seamlessly with my WordPress installation.
- CDN Integration: While I used Cloudflare independently, many hosting providers offer seamless integration with CDNs or even have their own proprietary CDNs, further enhancing global website speed optimization.
- Ignoring Mobile Performance in the Early Stages:
- Over-Optimizing to the Point of Breaking Functionality:
- Not Regularly Monitoring Performance:
- Choosing the Wrong Tools or Configuration:
- Neglecting the «»Human Element»» in Testing:
- Reduced Bounce Rate: Visitors are no longer abandoning my site out of impatience. They stay longer, exploring more content.
- Improved User Engagement: A faster site encourages deeper interaction, with users more likely to click through to other pages, leave comments, and engage with calls to action.
- Enhanced SEO Rankings: With improved page speed and Core Web Vitals, my content is now better positioned to rank higher in search engine results, driving more organic traffic.
- Increased Conversions: Whether it’s newsletter sign-ups, product purchases, or contact form submissions, the smoother user experience directly translates to higher conversion rates.
- Better Brand Perception: A fast, responsive website projects professionalism and reliability, strengthening my brand’s credibility.
* Lossless Compression: Tools like ShortPixel or Imagify (WordPress plugins) automatically optimize images upon upload, often reducing file size by 20-30% without any perceptible loss in quality. * Lossy Compression: For more aggressive reductions, especially on photographic content, I sometimes manually used tools like TinyPNG or TinyJPG for more significant file size cuts.
By systematically addressing these image-related issues, I saw an immediate and substantial improvement in my website speed optimization efforts. It was a foundational change that paved the way for further enhancements.
Plugin Bloat & Code Clutter
Once the image monster was tamed, my attention turned to another pervasive issue: plugin bloat and code clutter. As a WordPress user, the ease of adding functionality with plugins is a double-edged sword. While incredibly convenient, each plugin often brings its own set of CSS, JavaScript, and database queries, which can quickly accumulate and bog down a website. My site was no exception, laden with plugins I no longer actively used, or those that were poorly coded, adding unnecessary weight to every page load. This was a silent killer of web performance.
The cumulative effect of numerous plugins and unoptimized code was significant. Each added script or stylesheet meant an additional HTTP request, delaying the browser’s ability to render the page. Render-blocking JavaScript and CSS files forced the browser to pause its rendering process until these resources were downloaded and processed. Furthermore, many themes and plugins were not designed with efficiency in mind, leading to bulky CSS and JavaScript files that were not minified or combined, further contributing to a slow page speed. This became a critical area for me to optimize website for faster loading.
My approach to tackling plugin bloat and code clutter involved a rigorous audit and strategic implementation of optimization techniques:
– I went through every single plugin installed on my site. – For each plugin, I asked: «»Is this absolutely essential? Is there a lighter alternative? Am I actually using all its features?»» – Plugins that were inactive, redundant, or provided minimal value were deactivated and completely deleted. This is crucial, as even inactive plugins can sometimes leave behind code or database entries. – I consolidated functionality where possible, opting for multi-purpose plugins from reputable developers that were known for their performance. For instance, using a single caching/optimization plugin that also handles minification and deferral, rather than separate plugins for each.
– Minification is the process of removing unnecessary characters from code (like whitespace, comments, and line breaks) without changing its functionality. This reduces file size, leading to faster downloads. – I used a dedicated website speed optimization plugin (like WP Rocket or Autoptimize) to automatically minify CSS, JavaScript, and HTML files across my entire site.
– Instead of loading multiple small CSS files or JavaScript files individually, combining them into fewer, larger files can reduce the number of HTTP requests the browser needs to make. This is particularly effective for older HTTP/1.1 connections. – My chosen optimization plugin handled this automatically, merging multiple CSS files into one and JavaScript files into another.
– By default, browsers stop rendering a page when they encounter a JavaScript file until that file is fully downloaded and executed. This is called render-blocking. – I configured my site to defer non-critical JavaScript (load it after the main content has rendered) or load it asynchronously (load it in parallel with other resources without blocking rendering). This significantly improved the perceived loading speed and Time To Interactive (TTI).
– GZIP is a server-side compression method that can significantly reduce the size of HTML, CSS, and JavaScript files before they are sent to the browser. It’s like zipping a folder before emailing it. – I confirmed with my hosting provider and verified using online tools that GZIP compression was enabled on my server. If not, it can often be enabled via `.htaccess` or server configuration.
By meticulously cleaning up my plugin ecosystem and implementing robust code optimization techniques, I managed to shave off another considerable chunk of my load times, making my site feel much snappier and responsive. This was a critical step in my journey to speed up website performance.
Caching: My Secret Weapon
After tackling the immediate concerns of bloated images and messy code, I turned my attention to caching – arguably the most impactful single strategy I employed to cut load times dramatically. Caching is essentially storing copies of your website’s files so that subsequent requests can be served much faster, bypassing the need to regenerate the content from scratch every time. It’s like having a pre-cooked meal ready instead of preparing it from raw ingredients for every guest. This significantly reduces the workload on your server and the time it takes for a page to appear in a user’s browser.
The power of caching lies in its ability to intercept requests and serve static versions of pages, images, and other assets. When a user visits your site, without caching, the server has to process PHP scripts, query the database, assemble the page, and then send it. With caching, a pre-built HTML version of your page is stored, and the server simply delivers that static file, which is incredibly fast. This not only reduces load times for repeat visitors but also significantly lightens the load on your server, allowing it to handle more traffic efficiently. It’s an indispensable component of effective website speed optimization.
I implemented several layers of caching to ensure maximum efficiency, creating a robust system that served content at lightning speed:
– Implementation: For my WordPress site, I chose a premium caching plugin like WP Rocket. It’s user-friendly and highly effective, offering robust page caching, cache preloading (which generates cached versions of pages before visitors request them), and browser caching settings. Alternatives like LiteSpeed Cache (if your host uses LiteSpeed servers) or W3 Total Cache are also excellent options. – Configuration: I configured WP Rocket to enable page caching, optimize for mobile, and set a reasonable cache lifespan, ensuring content was refreshed periodically without sacrificing speed.
– Implementation: My caching plugin automatically set the appropriate `Expires` or `Cache-Control` headers, telling browsers how long to store these assets. This dramatically sped up subsequent page views and visits.
– Implementation: While more advanced, some caching plugins or hosting environments (especially managed WordPress hosts) offer object caching (e.g., using Redis or Memcached). I leveraged my host’s built-in Redis object caching, which provided a noticeable boost in dynamic content loading.
– Implementation: I integrated Cloudflare, a popular CDN and security service. Beyond caching, Cloudflare also offers minification, Brotli compression, and other website performance tricks. It was a game-changer for global visitors, helping to speed up website content delivery across continents.
By strategically implementing these various forms of caching, I managed to create a highly efficient system that served content rapidly, drastically improving my how to reduce page load time efforts. This was the point where I started seeing the most significant and consistent improvements in my site’s overall speed metrics.
Don’t Forget Your Hosting!
While optimizing images, cleaning up code, and implementing robust caching are crucial, they can only take you so far if your foundation – your web hosting – is weak. This was a lesson I learned the hard way. Initially, I opted for a budget shared hosting plan, believing it would be sufficient. However, as my site grew and my optimization efforts progressed, I realized that my hosting provider was becoming the ultimate bottleneck, limiting any further gains in site speed. It’s like putting a racing engine in a car with wooden wheels; the potential is there, but the core infrastructure holds it back.
Shared hosting, while affordable, means your website shares server resources (CPU, RAM, disk I/O) with potentially hundreds, if not thousands, of other websites. This often leads to «»noisy neighbor»» issues where another site’s traffic spike or resource-intensive operations can severely impact your own site’s performance. My initial «»why is my website slow?»» queries often pointed to server response time, which is directly tied to hosting quality. To truly optimize website for faster loading, investing in appropriate hosting is non-negotiable.
Realizing the limitations of my shared hosting, I decided to upgrade. This wasn’t just about spending more; it was about investing in a reliable infrastructure that could support a fast loading website. Here are the key hosting features and considerations that became paramount in my journey:
The upgrade to a managed WordPress VPS, coupled with these specific features, was a game-changer. The time to first byte (TTFB), a critical server response metric, saw a dramatic improvement. This demonstrated that even with all other optimizations in place, a powerful and well-configured hosting environment is the bedrock of a truly fast loading website. It’s often the most overlooked aspect when people try to speed up website performance.
Mistakes I Made (So You Don’t)
My journey to cut load times wasn’t a straight line; it was filled with trial and error, a few wrong turns, and some valuable lessons learned. While the strategies I’ve shared were ultimately successful, it’s equally important to highlight the pitfalls I encountered. Understanding these common mistakes can save you time, effort, and frustration in your own website speed optimization endeavors.
Here are some of the missteps I made and what I learned from them:
– Mistake: Initially, I focused almost exclusively on desktop load times. My desktop scores improved, but mobile scores remained dismal. I failed to recognize that a significant portion of my audience accessed my site via mobile devices. – Lesson: Mobile-first indexing and the increasing prevalence of mobile browsing mean that mobile performance is not an afterthought; it’s paramount. Always monitor and optimize for mobile devices as a priority. Use Google PageSpeed Insights’ mobile score as a key indicator. Responsive design and optimized mobile assets are crucial for how to cut website load times on smaller screens.
– Mistake: In my eagerness to achieve perfect scores, I sometimes aggressively minified JavaScript, combined files too zealously, or enabled every single optimization setting without proper testing. This occasionally led to broken forms, non-functioning sliders, or even visual glitches on my site. – Lesson: Website speed optimization is a balancing act. Always test thoroughly after implementing any change. Use a staging environment if possible. Incremental changes with rigorous testing are far better than sweeping changes that introduce bugs. Prioritize user experience over a perfect score if a minor score difference leads to broken features.
– Mistake: After achieving initial improvements, I sometimes fell into the trap of «»set it and forget it.»» Over time, new content, plugin updates, or theme changes would subtly degrade performance, and I wouldn’t notice until analytics showed a dip or a user complained. – Lesson: Website optimization is an ongoing process, not a one-time fix. Schedule regular performance audits (e.g., monthly or quarterly) using tools like GTmetrix or PageSpeed Insights. Integrate performance monitoring into your routine to catch regressions early and maintain a fast loading website.
– Mistake: Not all plugins are created equal, and not all configurations are optimal for every site. I sometimes chose a popular caching plugin without fully understanding its settings or compatibility with my theme/other plugins, leading to conflicts or sub-optimal results. – Lesson: Research tools thoroughly. Read reviews, check for recent updates, and ensure compatibility. When configuring caching or optimization plugins, start with recommended settings and then incrementally adjust, testing each change. Sometimes a less popular but more specialized plugin might be a better fit than a generalist one.
– Mistake: I relied heavily on automated tools, which are excellent for technical metrics, but sometimes overlooked the subjective user experience. A page might technically load fast, but if content jumps around (Cumulative Layout Shift – CLS) or interactive elements are delayed, it still feels slow to the user. – Lesson: Always perform manual testing on various devices and browsers. Pay attention to Core Web Vitals (Largest Contentful Paint, First Input Delay, and Cumulative Layout Shift) which capture key aspects of user experience. A truly fast loading website feels fast, not just measures fast.
Learning from these mistakes was as crucial as implementing the successful strategies. They reinforced the idea that how to speed up website performance requires a holistic, patient, and iterative approach, always keeping the end-user experience at the forefront.
Now My Site Flies!
The transformation of my website has been nothing short of remarkable. What once was a source of constant frustration and a barrier to growth is now a beacon of efficiency. The cumulative effect of meticulously optimizing images, rigorously pruning plugins and code, implementing intelligent caching strategies, and finally investing in robust hosting has resulted in a dramatic improvement. My average page load time, which once hovered around 4-5 seconds, has consistently dropped to under 2 seconds, achieving my initial goal of cutting load times by a full 2 seconds, and often even more. This isn’t just a number; it’s a tangible difference that resonates across every aspect of my online presence.
The benefits of this comprehensive website speed optimization are profound and quantifiable. My Google PageSpeed Insights scores, once languishing in the red, now consistently hit the high 90s for both mobile and desktop, a testament to the effectiveness of these website performance tricks. More importantly, the impact on my audience and business metrics has been overwhelmingly positive:
Achieving a fast loading website wasn’t a magic bullet; it was the result of a systematic and persistent effort. It required understanding the core principles of how to reduce page load time and applying actionable solutions. While the initial push was intense, maintaining this performance is an ongoing commitment. I continue to monitor my site’s speed, regularly audit new content and plugins, and stay informed about the latest web performance best practices.
My journey from a sluggish site to one that truly «»flies»» demonstrates that how to speed up website performance is within reach for anyone. It requires diagnosis, a strategic plan, the right tools, and a commitment to continuous improvement. If you’re struggling with a slow website, don’t despair. By following the steps outlined here – tackling images, cleaning code, leveraging caching, and ensuring quality hosting – you too can transform your online platform and unlock its full potential. The investment in website optimization pays dividends far beyond just a faster loading screen; it’s an investment in your audience, your brand, and your long-term success.